5 Ways to Style and Photograph Acrylic Drinkware for Instagram
Say a set of pink glasses has just come out of the box. You line them up on the dining table, take a photo, and it looks like a product shot from a shop that closed years ago. There’s glare on the left, a charger cable in the back, and the pink has gone a strange grey.
It happens a lot, and the glasses are rarely the problem. Light and setup cause most of it. Acrylic is also easier to practise with than glass, since you can drag it around and restack it without worrying. The acrylic glass set photography tips below work with an ordinary phone, and they help if you’re slowly building an Instagram home décor page too.
1. Use Natural Light to Highlight Acrylic Drinkware
Windows are free, so use one. Drag a table close to it and shoot when the day is mellow, either early morning or the hour before sunset. In the afternoon the light is so hard that acrylic throws back white patches, and no filter rubs those out. A thin white curtain softens it. A bedsheet works as well, honestly.
Overhead lights are the next thing to switch off. Tube lights and yellow bulbs tint everything, and that tint is a pain to fix later. If one side of the glasses goes dark, lean a piece of white foam board on the shadow side and watch it brighten.
Here’s one trick for colour glass set photography. Stand the glasses between the camera and the window. The light travels through the colour, and each glass seems to light up on its own.
That’s where Colour Glass sets in amber, green or rose really pay off, since the backlight deepens the shade.
2. Choose Backgrounds That Make Your Drinkware Stand Out
The background does half the selling. Here’s a rough rule that holds most of the time. The louder the glass, the quieter the backdrop.
- Bright or deep colours: white wall, linen, light wood
- Clear or pastel glasses: dark tray, grey stone, a textured cloth
- Anything with a pattern: keep it out of the frame
Deciding on shades before the shoot saves a lot of shuffling, and acrylic glassware gives you plenty to choose from. For a head start, this piece on color combinations for drinkware and glassware sets shows what looks good together.
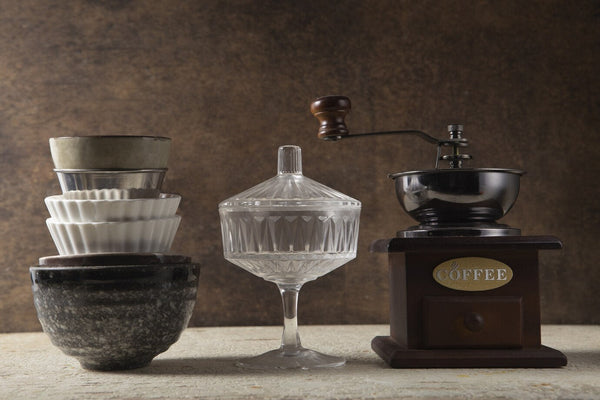
A Classic Design Glass has a simple outline. So it looks sharpest on a dark or textured surface where the shape doesn’t get lost.
3. Add Drinks, Garnishes, and Props for Visual Interest
Fill the glasses. An empty one looks like a catalogue prop. While a full one looks like somebody is about to drink it. Iced tea, lemonade, mango juice and cold coffee all work. Ice does the most. Add a mint leaf or a lemon wheel. Then mist the outside with a spray bottle so it looks properly cold.
Props come after that. A napkin, a plate of samosas, a small vase. Two at most, in colours close to the drinks, so the glasses stay the star.
The occasion helps too. Think Rooh Afza at iftar, nimbu pani on a hot Sunday, or a tray of chilled falooda glasses. For acrylic drinkware styling Pakistan, these drinks are half the styling already. Since the colour comes built in.
If there’s a Colour Jug around, put it in the middle and arrange the glasses around it. The table starts to look like one somebody actually set.
4. Experiment With Camera Angles and Composition
You can try three heights. These include eye level, straight down, and somewhere near 45 degrees. Shoot all three and pick the winner later. Eye level makes glasses look tall. Overhead suits a full table. The 45 degree one shows the drink and the table together, and it’s usually the keeper.
Odd numbers look better. So go for three or five glasses instead of four.
Clean them first. Acrylic grabs fingerprints, and a microfibre cloth takes seconds while retouching takes ages.
Most home photography tips come down to patience with small things. Take one close up of the ice and droplets, then step back for the whole table. Moving the phone just a little between shots often makes the difference.
A few pieces from Beverageware Sets make grouping easy, since the shapes already belong together.
5. Edit Your Photos Without Losing the Natural Look
Free apps handle it. Snapseed, Lightroom Mobile or Instagram’s own editor will do. Four tweaks usually cover it:
- Brightness up a little
- Warmth adjusted if the photo looks blue or yellow
- Highlights down a notch
- Crop to 4:5
Saturation is where people get carried away. If the photo shows neon pink and the glass at the door is soft pink, that’s a returned parcel waiting to happen. Leave some reflection in too, because that bit of shine tells viewers it’s glass.
Save the edit as a preset and use it on every post.
How to Create a Cohesive Acrylic Drinkware Instagram Feed
A feed looks planned when a few things stay put. These are the palette, the light and the backdrop. Pick pastels, earthy tones or jewel shades and stick with them for a month or so. Then vary the shots. A close-up, a flat lay, a hand picking up a glass.
Reels and Stories suit the messy middle, like setting up the table or pouring a drink. Viewers watch those more than you’d expect.
Add a branded hashtag and a few local ones. A page featuring stylish acrylic glasses Pakistan buyers can order tends to attract the right crowd through local tags.
Find Acrylic Drinkware for Your Next Instagram Setup from Homentable
Homentable sells drinkware that holds up to daily use and still looks good on camera. The colours and shapes vary enough that one set can work for a Saturday shoot and a Sunday dinner.
Start with the Acrylic Glassware collection and choose pieces that match your palette.
Buying more than a few? The Bundle Deals can bring the total down.
Conclusion
Light, backdrop, props, angles and a gentle edit. That’s the whole list. The next time a new set shows up, use these acrylic glass set photography tips, move the table near the window and take the first shot before the ice melts.
FAQ's
1. Why does acrylic glassware look cloudy in photos?
Fingerprints and dust are common causes. A quick wipe with a soft cloth often fixes it.
2. What background works best for photographing acrylic glasses?
Bold glasses often suit light, plain surfaces. Clear or pastel ones usually stand out more on darker ones.
3. What free apps can I use to edit drinkware photos on my phone?
Snapseed and Lightroom Mobile are popular. Instagram’s own editor works for quick fixes.
4. Which acrylic glass colour photographs best for Instagram?
Hard to say, since feeds differ. Amber, green and pink often look rich with window light behind them.
5. How do I style a jug and glass set for an Instagram photo?
Try the jug in the middle, glasses around it, and maybe one napkin. Fewer props usually look better.
6. How do you avoid glare when photographing acrylic glasses?
Strong light hitting the glass straight on is the usual cause. A thin curtain or a slight tilt of the phone can help.
7. What is the best time of day to photograph glassware with natural light?
Early morning and the hour before sunset are usually kinder than noon.
8. How do you make drinks look fresh and cold in glass photos?
Ice helps most. A light water mist and a mint leaf add to it, but shoot soon after pouring.
9. What camera angle is best for photographing glasses and drinkware?
No single best one. Try eye level, overhead and 45 degrees, then keep your favourite.
10. How do you keep an Instagram feed consistent for a home décor page?
Keep the colours, light and edit similar, and change the shot type now and then.